In this video you’ll learn how to add instant custom payments to your WooCommerce business site in minutes!
We recently completed a site for a customer who is a massage therapist. She wanted to improve her customer experience and bottom line by offering massage services and scheduling in an easy to way for her customers.
We set her up at WPLaunchify with one of our WordPress As A Service (WaaS) hosted site solutions so that her customers simply pick a service, choose a time and pay with credit or debit card. Easy!
But there were also situations where she or her customers needed to charge through a custom amount of money, such as for additional services or extended times.
In order to achieve this, we simply used the built-in feature of our LaunchFlows plugin for instant payments of any amount.
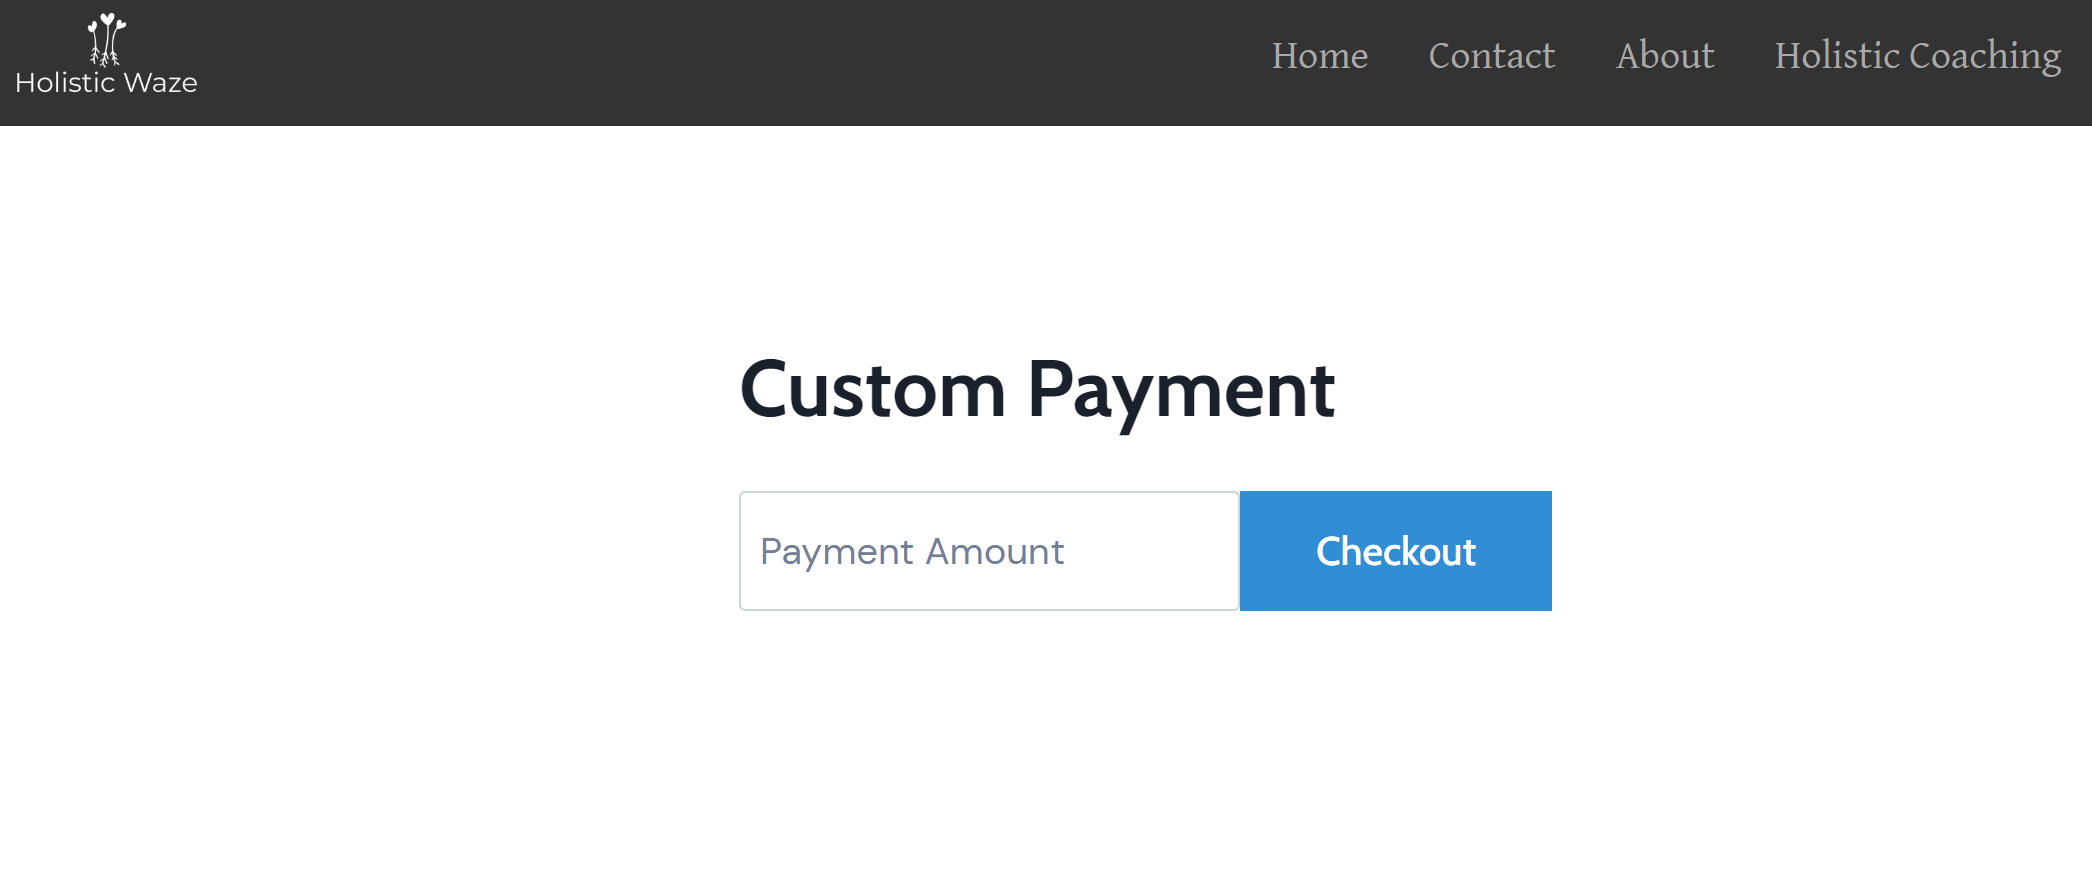
By dropping a single Gutenberg block (or shortcode) into the WooCommerce product layout, and configuring a few simple options, she is now able to offer a way for a customer to pay any dollar amount immediately, using credit or debit card.
Best of all, the customer is taken into her custom CRM and all the same follow-up automations happen immediately, since this is part of her main sales and marketing system using our WordPress As A Service solution.
Anyone can get started using our Hosted Site Solution for as little as $30/mo, or the LaunchFlows plugin for just $50/yr, so there is virtually no situation where it wouldn’t pay for itself immediately.
BTW, if you’re in the Chicagoland area and need a highly qualified massage therapist for sports injuries or general wellness, I highly recommend Shawna Bruchert at HolisticWaze.com
Ingredients:
LaunchFlows
WPLaunchify
Hosted Site Solution
If you’ve installed the LaunchFlows plugin, or are using our WordPress As A Service solution, you can get setup in a couple minutes.
Create a new product in WooCommerce, and set the type to “simple product”, as well as choosing “virtual” and “downloadable” from the product data option menu.
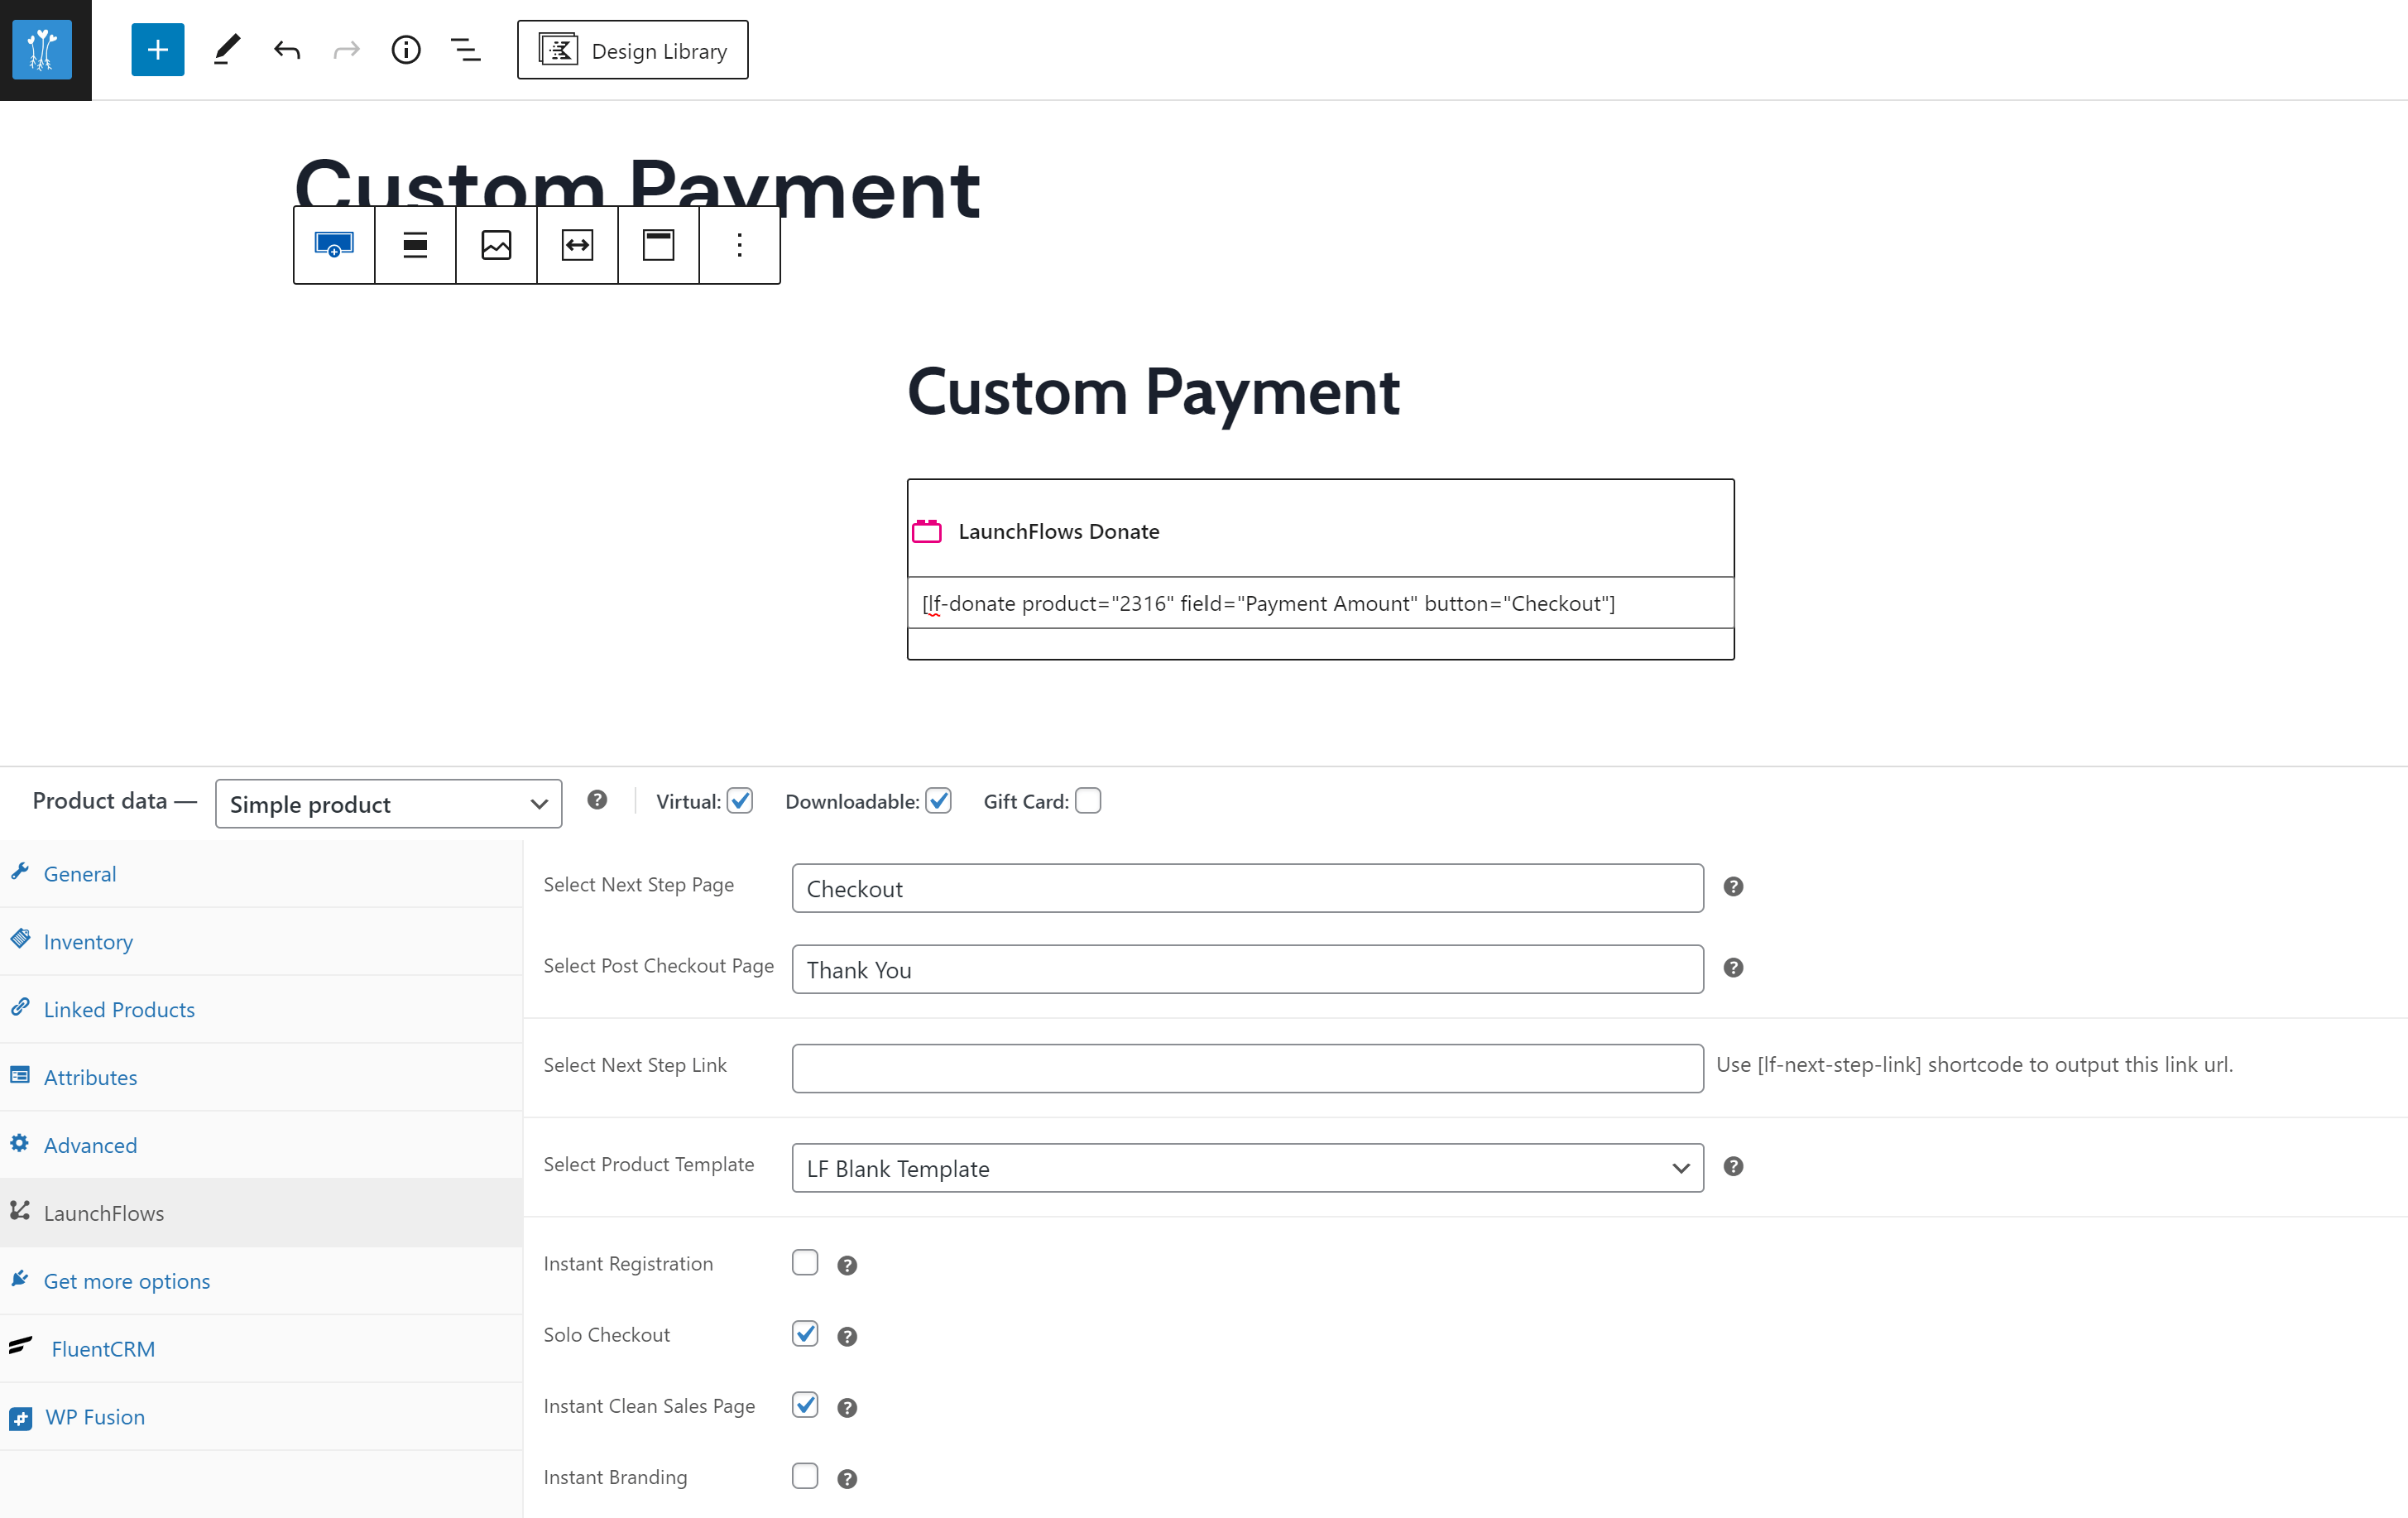
Then set the price to either $0 or $1 as the default minimum amount ($0 is typical)
Configure the template as the “LF Blank Template” so that the standard WooCommerce product layout will not appear.
Drop in the LaunchFlows “Donation” block or shortcode, in order to make the form appear.
You can optionally add a headline above the form to say “Custom Payment” or whatever you prefer.
Change the product id in the block or shortcode to match the id of the product you have created for taking these custom payments.
Finally, configure the LaunchFlows tab to send buyers to your global or custom Checkout page after they click the custom payment button, and set the thank you or post checkout page where they will be sent after the checkout is complete.
You’re done!
LaunchFlows Documentation Details Here
More Info:
Signup for our free WPLaunchKit newsletter and demo this recipe today
Subscribe to our YouTube Channel
Join our Club for more WordPress solutions and training
Need Help? Book a call (free or paid) with Spence